
Picking the Perfect Cherries for Your Pie
When it comes to making a delicious cherry pie, the first step is selecting the perfect cherries. Choosing the right cherries can make all the difference in the flavor and overall success of your pie. Here are some tips for picking the best cherries for your cherrylicious delight.
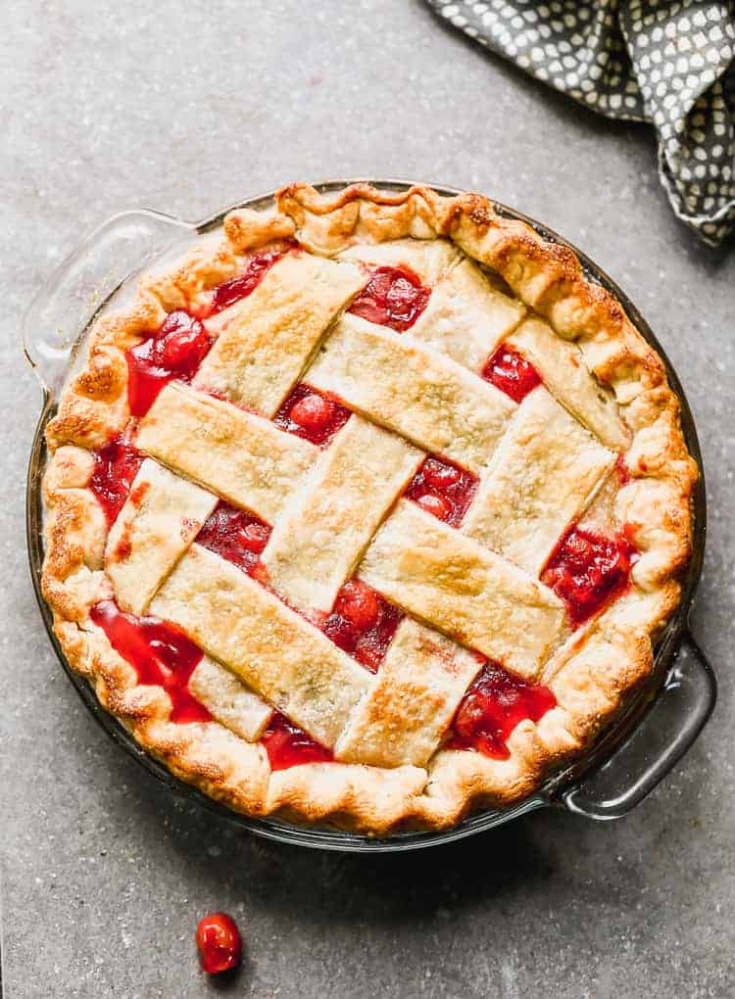
Image Source: tastesbetterfromscratch.com
First and foremost, you’ll want to look for fresh, ripe cherries. When selecting cherries, be sure to pick ones that are firm and plump, with a deep red color. Avoid cherries that are soft or wrinkled, as they may be past their prime and won’t provide the best flavor for your pie.
Another important factor to consider when picking cherries is the variety. Sweet cherries, such as Bing or Rainier, are ideal for cherry pies as they have a higher sugar content and a sweeter flavor. Sour cherries, like Montmorency, can also be used for a tart and tangy pie filling, depending on your preference.
If possible, try to purchase cherries that are locally grown and in season. Not only will they be fresher, but they will also have a more intense flavor. You can usually find fresh cherries at farmers’ markets or specialty grocery stores during the summer months when cherries are in peak season.
When you bring your cherries Home, be sure to give them a good rinse under cold water to remove any dirt or debris. You can also pit the cherries at this time if your Recipes-ideas/’>Recipe calls for it, or you can leave them whole if you prefer.
Overall, picking the perfect cherries for your pie is an important first step in creating a cherrylicious delight. By choosing fresh, ripe cherries with a sweet or tart flavor profile, you’ll be well on your way to making a mouthwatering cherry pie that will impress your family and friends. So go ahead, pick the best cherries you can find and get ready to bake up a delicious cherry pie that everyone will love!
Get Ready to Roll: Making the Perfect Crust
Welcome to the second step in creating your Cherrylicious delight – making the perfect crust for your fresh cherry pie! A delicious pie starts with a flaky, buttery crust that complements the sweet filling inside. With a few simple ingredients and a little bit of patience, you can create a crust that will have everyone coming back for seconds.
The key to a great pie crust is using cold ingredients and handling the dough gently. Start by gathering your flour, butter, salt, and ice water. Using a pastry cutter or your fingertips, work the cold butter into the flour until it resembles coarse crumbs. This step is crucial for creating a flaky crust, as the small bits of butter will melt in the oven and create pockets of air that give the crust its light texture.
Next, add in the salt and gradually drizzle in the ice water, mixing until the dough comes together. Be careful not to overwork the dough, as this can make it tough instead of tender. Once the dough is formed, shape it into a disk and wrap it in plastic wrap. Chill the dough in the refrigerator for at least 30 minutes to allow the gluten to relax and the butter to firm up.
When you’re ready to roll out the crust, flour your work surface and rolling pin to prevent sticking. Unwrap the chilled dough and place it on the floured surface. Using gentle pressure, roll the dough out into a circle that is about 1/8 inch thick. If the dough starts to crack or tear, simply patch it up with a little water and continue rolling.
Once the dough is rolled out, carefully transfer it to your pie dish. Gently press the dough into the bottom and sides of the dish, being careful not to stretch it too much. Trim any excess dough from the edges, leaving about an inch overhang. This overhang will help to seal the top crust to the bottom crust later on.
Now it’s time to add the filling to your pie crust. Spoon the sweet cherry filling into the prepared crust, being sure to distribute it evenly. If you’re feeling adventurous, you can even add a lattice or decorative top crust to your pie. Simply cut strips of dough and weave them together on top of the filling for a beautiful presentation.
Before baking, brush the top crust with an egg wash to give it a golden, shiny finish. This step is optional, but it adds a professional touch to your Homemade pie. Finally, sprinkle a little sugar on top for extra sweetness and crunch.
Now that your pie is assembled and ready to go, it’s time to bake it to perfection. Follow the Recipes-ideas/’>Recipe instructions for baking time and temperature, and be sure to keep an eye on the crust to prevent it from burning. Once your pie is golden brown and bubbling, remove it from the oven and let it cool slightly before serving.
With a flaky crust and a sweet cherry filling, your Cherrylicious delight is sure to be a hit at any gathering. So roll up your sleeves, get ready to roll, and create a pie that will have everyone asking for seconds!
Sweet Cherries, Sweet Filling: Assembling Your Pie
Welcome back to our cherrylicious adventure in making a fresh cherry pie! Now that we have picked the perfect cherries and prepared the perfect crust, it’s time to move on to the most delicious part – assembling the sweet filling of our pie.
The filling is the heart and soul of any cherry pie, and using the right ingredients and techniques will ensure that your pie is bursting with flavor and sweetness. So let’s dive in and learn how to assemble a truly cherrylicious delight.
First things first, let’s talk about the star of the show – the cherries. When assembling your pie, it’s important to pit and stem your cherries. You can do this using a cherry pitter or a paring knife. Make sure to remove any pits and stems to ensure a smooth and enjoyable eating experience.
Once your cherries are prepped, it’s time to add the sweet filling. In a mixing bowl, combine your pitted cherries with sugar, cornstarch, lemon juice, and a pinch of salt. The sugar will enhance the natural sweetness of the cherries, while the cornstarch will help thicken the filling as it bakes. The lemon juice adds a pop of brightness and balances out the sweetness of the cherries.
Mix everything together gently, making sure that the cherries are evenly coated with the sugar mixture. Be careful not to crush the cherries, as you want them to hold their shape and texture when baked.
Next, it’s time to transfer the cherry filling into your prepared pie crust. Make sure to spread the cherries out evenly, filling any gaps in the crust. You want a nice even layer of cherries that will bake up beautifully and create a flavorful and juicy filling.
To add an extra touch of sweetness and flavor, you can dot the top of the cherry filling with small cubes of butter. As the pie bakes, the butter will melt and mingle with the cherry juices, creating a rich and decadent filling that will have everyone coming back for seconds.
Once your filling is assembled, it’s time to add the top crust. You can go for a classic double crust pie, or get creative with a lattice or crumble topping. Whichever you choose, make sure to seal the edges of the crust well to prevent any leaks or spills during baking.
Before baking your pie, don’t forget to brush the top crust with an egg wash or milk to give it a beautiful golden brown finish. This will not only make your pie look extra inviting, but it will also add a touch of richness to the crust.
And there you have it – a sweet cherry pie ready to bake to perfection. Pop it into the oven and let the sweet aroma of cherries and buttery crust fill your kitchen. In just a short time, you’ll have a cherrylicious creation that is sure to impress your friends and family.
So go ahead, assemble your pie with love and care, and watch as it transforms into a delicious and delightful treat that will have everyone asking for seconds. Enjoy the process, savor the flavors, and most importantly, have fun creating your very own cherrylicious delight!
Bake, Serve, and Enjoy Your Cherrylicious Creation!
Congratulations! You’ve gone through the process of picking the perfect cherries, making the perfect crust, and assembling a sweet cherry filling for your pie. Now, it’s time for the final step – baking, serving, and enjoying your cherrylicious creation!
Preheat your oven to the specified temperature for your cherry pie Recipes-ideas/’>Recipe. This step is crucial in ensuring that your pie bakes evenly and comes out perfectly golden brown. While you wait for the oven to heat up, take a moment to admire your handiwork – the vibrant red cherries peeking out from under the flaky crust, promising a burst of sweet and tart flavors with every bite.
Carefully place your cherry pie in the preheated oven, making sure to set a timer so you don’t forget about it. The tantalizing aroma of cherries and buttery crust will soon fill your kitchen, making it hard to resist peeking through the oven window to check on the progress of your pie. But remember, patience is key when it comes to baking a perfect cherry pie.
As your pie bakes, take the time to prepare a few extra special touches to serve alongside it. Whipped cream or vanilla ice cream are classic choices that complement the flavors of the cherry filling beautifully. You could also consider making a simple cherry sauce to drizzle over each slice for an extra burst of cherry flavor.
When the timer dings and your cherry pie is done baking, carefully remove it from the oven and place it on a cooling rack. The hardest part is yet to come – waiting for the pie to cool before slicing into it. But trust me, the wait will be worth it when you take that first bite of your cherrylicious creation.
Once your pie has cooled to a reasonable temperature, it’s time to slice it and serve it up to eager guests or hungry family members. The flaky crust will give way to a luscious filling of sweet cherries, their juices bubbling up and mingling with the buttery pastry. Each bite is a symphony of flavors and textures, a perfect balance of sweet and tart that is sure to please even the most discerning palate.
As you enjoy your cherry pie, take a moment to savor the fruits of your labor (quite literally). The time and effort you put into selecting the perfect cherries, making the perfect crust, and assembling the perfect filling have all come together in this delicious dessert. And the best part? You can share the joy of your cherrylicious creation with those around you, spreading happiness one slice of pie at a time.
So go ahead, bake, serve, and enjoy your cherry pie with pride. Whether it’s a special occasion or just a regular day, your cherrylicious creation is sure to bring smiles and satisfaction to all who partake. And who knows, you may just find yourself inspired to create more cherrylicious delights in the future.
how to make a cherry pie with fresh cherries


