
Crimping Pie Crust: A Flaky Delight!
Are you looking to elevate your pie baking skills and take your crust game to the next level? Look no further than mastering the art of crimping pie crust like a pro. Crimping is not just about sealing the edges of your pie, it’s about creating a beautiful and professional finish that will impress all your friends and family. With a few simple tips and tricks, you can crimp like a pro and achieve that flaky delight you’ve always dreamed of.
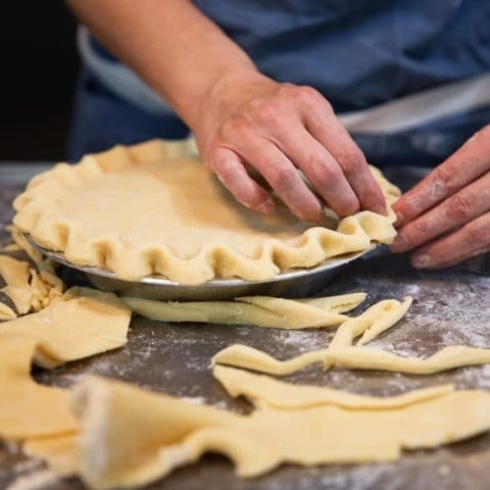
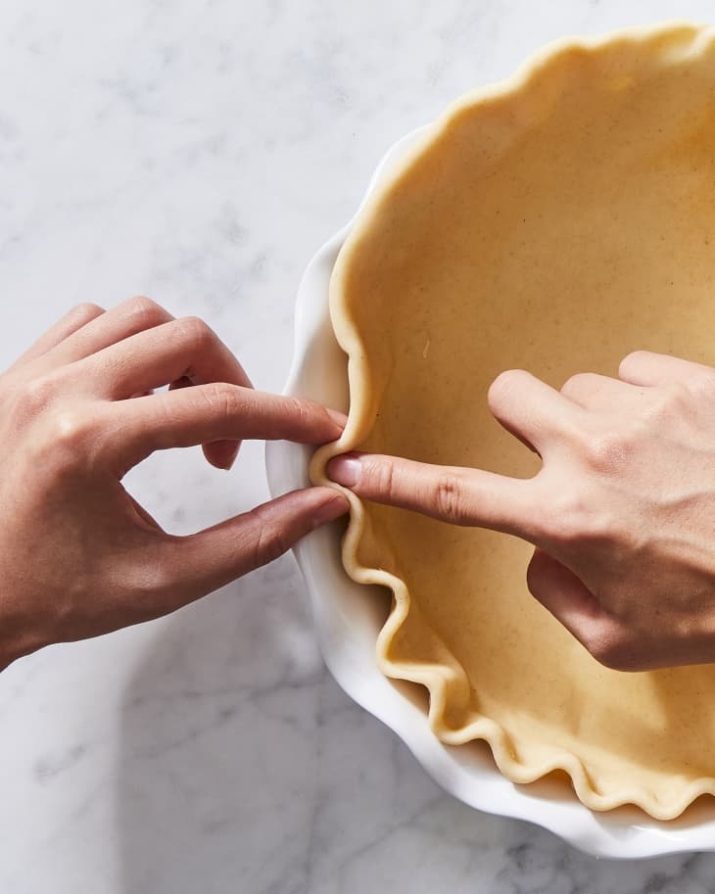
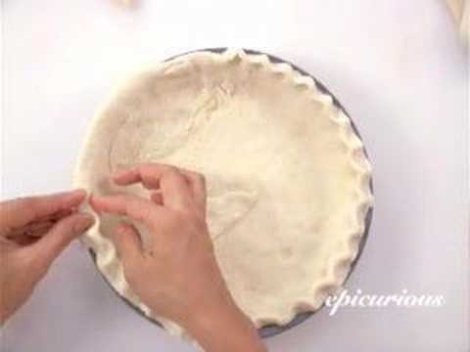
Image Source: ytimg.com
One of the most important things to keep in mind when crimping pie crust is to start with a well-chilled dough. This will make the dough easier to work with and will help prevent shrinking during baking. Once your dough is chilled, roll it out to the desired size and thickness, making sure to work quickly to prevent the dough from getting too warm.
Next, carefully transfer your rolled-out dough to your pie dish, making sure to gently press it into the corners and edges. Trim any excess dough from the edges, leaving about a half-inch overhang. This overhang will be used to create the beautiful crimped edge that will make your pie stand out.
Image Source: apartmenttherapy.info
To crimp the edges of your pie crust, there are several different techniques you can use. One popular method is the classic fork crimp, where you simply press the tines of a fork into the edge of the crust all the way around the pie. This creates a simple and uniform design that adds a touch of elegance to your pie.
Another popular crimping technique is the finger crimp, where you use your thumb and forefinger to pinch the dough into a decorative pattern. This technique allows for more creativity and personalization, as you can experiment with different patterns and designs to create a unique look for your pie.
Image Source: thegourmandiseschool.com
If you’re feeling extra fancy, you can try your hand at the rope crimp, where you use a knife or pastry wheel to create a rope-like pattern around the edge of the crust. This technique requires a bit more skill and practice, but the end result is sure to wow your guests and make your pie stand out from the rest.
No matter which crimping technique you choose, the key is to work quickly and confidently, making sure to seal the edges of the crust securely to prevent any leaks during baking. A well-crimped pie crust will not only look beautiful but will also help your pie hold its shape and prevent the filling from spilling out.
So, the next time you’re baking a pie, don’t forget to master the art of crimping pie crust like a pro. With a little practice and a lot of love, you can create a flaky delight that will impress everyone who takes a bite. Happy baking!
Get Ready to Wow with Perfect Edges
When it comes to baking a pie, the crust is just as important as the filling. A flaky, buttery crust can take your pie from good to great, and mastering the art of crimping is key to achieving those perfect edges that will wow your friends and family. Whether you’re a seasoned baker or just starting out, these tips will help you crimp like a pro and impress everyone with your pie-making skills.
One of the most important things to remember when crimping pie crust is to keep your dough cold. This will help prevent the butter from melting too quickly and ensure that your crust stays flaky and delicious. Before you start crimping, make sure to chill your dough for at least 30 minutes in the refrigerator.
When it comes to shaping your pie crust, there are several different techniques you can use to create beautiful, decorative edges. One popular method is the classic fluted edge, which involves pinching the dough between your thumb and index finger to create a scalloped pattern. This simple yet elegant technique is perfect for traditional fruit pies and will add a touch of sophistication to your baked goods.
If you’re feeling more adventurous, you can try your hand at creating a braided edge. This technique involves cutting strips of dough and weaving them together to form a decorative border around your pie. Not only does this method look impressive, but it also adds an extra layer of texture and flavor to your finished product.
For those looking to take their crimping skills to the next level, there are endless possibilities for creating intricate designs and patterns on your pie crust. From lattice tops to cut-out shapes, the only limit is your imagination. Experiment with different techniques and have fun with it – after all, baking should be an enjoyable and creative experience.
In addition to keeping your dough cold and experimenting with different crimping techniques, there are a few more tips that will help you achieve pie perfection. First, make sure to trim any excess dough from the edges of your pie before crimping – this will help prevent the crust from shrinking during baking. Second, always egg wash your pie crust before baking to give it a golden, shiny finish. Finally, don’t forget to brush the edges of your pie with a little cream or milk to help seal them together and prevent them from unraveling.
With these tips in mind, you’ll be well on your way to mastering the art of crimping pie crust like a pro. Whether you’re baking a classic apple pie or trying your hand at a savory quiche, perfecting your crimping skills will take your pies to the next level and earn you rave reviews from everyone who tries them. So roll up your sleeves, dust off your rolling pin, and get ready to wow with perfect edges that will elevate your baking game to new heights.
Pie Perfection: Tips for Crimping Success
Are you ready to take your pie-making skills to the next level? Crimping the edges of a pie crust may seem like a daunting task, but with the right tips and techniques, you can achieve pie perfection every time. Whether you’re a seasoned baker or a beginner in the kitchen, mastering the art of crimping pie crust like a pro is sure to impress your friends and family. In this article, we’ll explore some expert tips for crimping success that will elevate your pies to the next level.
First and foremost, it’s important to start with a well-chilled pie dough. This will make it easier to work with and will help prevent it from becoming too sticky or soft. When rolling out your dough, make sure to do so on a lightly floured surface to prevent sticking. Aim for an even thickness throughout the dough to ensure that your crust bakes evenly.
Once you’ve rolled out your dough and placed it in your pie dish, it’s time to start crimping the edges. There are several different crimping techniques you can use, such as the classic flute, rope, or fork crimp. Experiment with different styles to find the one that works best for you and the type of pie you’re making.
To achieve perfectly crimped edges, it’s important to use a light touch. Pressing too hard can cause the dough to tear or become misshapen. Instead, gently press the dough with your fingers or a fork to create a decorative edge. Remember, practice makes perfect, so don’t be afraid to try different techniques until you find the one that works best for you.
Another important tip for crimping success is to make sure your pie crust is properly sealed. This will help prevent the filling from leaking out during baking. To seal your pie crust, simply fold the excess dough under itself and press it gently against the edge of the pie dish. You can also use a fork to create a decorative pattern that will help seal the edges.
In addition to sealing your pie crust, it’s important to chill it before baking. This will help prevent shrinkage and ensure that your crust maintains its shape during baking. Simply place your pie in the refrigerator for about 30 minutes before baking to firm up the dough.
When it comes to baking your pie, make sure to preheat your oven to the correct temperature. This will help ensure that your crust bakes evenly and achieves a golden brown color. If your crust starts to brown too quickly, you can cover it with aluminum foil halfway through baking to prevent burning.
Finally, don’t be afraid to get creative with your crimping. Experiment with different patterns and designs to create a truly unique and beautiful crust. Whether you’re making a classic apple pie or a decadent chocolate cream pie, the right crimping technique can take your dessert to the next level.
So there you have it, some expert tips for crimping success that will help you master the art of pie crust like a pro. With a little practice and patience, you’ll be crimping your way to pie perfection in no time. Happy baking!
Crimp Like a Pro and Impress Everyone!
Are you ready to take your pie baking skills to the next level? Crimping the edges of a pie crust may seem like a small detail, but it can make a big difference in the overall presentation and taste of your pie. With a little practice and some helpful tips, you can crimp like a pro and impress everyone with your baking skills.
One of the most important things to remember when crimping pie crust is to work with a well-chilled dough. This will help prevent the butter in the dough from melting too quickly, which can result in a tough crust. Make sure to let your dough chill for at least 30 minutes before rolling it out and crimping the edges.
When it comes to crimping, there are many different techniques you can use. One classic method is the fluted edge, where you use your fingers or a fork to create a decorative pattern around the edge of the crust. Another option is the rope edge, where you use a fork to press down on the edge of the crust, creating a braided look.
If you want to get really fancy, you can try the lattice edge, where you weave strips of dough over the top of the pie to create a lattice pattern. This technique takes a bit more time and practice, but the end result is sure to impress your guests.
One tip to keep in mind when crimping pie crust is to make sure that the edges are sealed tightly. This will help prevent the filling from leaking out during baking, resulting in a soggy bottom crust. You can use a fork or your fingers to press the edges of the crust together, making sure to seal them well.
Another important tip for crimping pie crust is to avoid stretching the dough as you crimp. This can cause the crust to shrink during baking, resulting in a tough, chewy texture. Instead, gently press the dough together as you crimp, being careful not to pull or stretch it.
To really impress your guests, you can experiment with different decorative techniques when crimping your pie crust. Try using cookie cutters to create shapes out of the dough, or use a paring knife to create intricate designs. The possibilities are endless, so don’t be afraid to get creative and have fun with your pie crust.
In addition to creating a beautiful presentation, crimping your pie crust can also help ensure that your pie cooks evenly. By sealing the edges of the crust well, you can prevent the filling from bubbling over and causing a mess in your oven. This will result in a perfectly baked pie with a crisp, flaky crust.
So, the next time you bake a pie, don’t forget to put some extra effort into crimping the edges of the crust. With a little practice and some helpful tips, you can crimp like a pro and impress everyone with your baking skills. Your pies will not only look beautiful, but they will taste delicious too. Happy baking!
how to crimp pie crust


