
Let’s Get Chopping: Apple Pie Prep 101
When it comes to making the perfect apple pie, one of the most important steps is getting your apples prepped and ready for baking. Knowing how to properly chop and slice your apples can make all the difference in the final outcome of your pie. So, grab your cutting board and knife, and let’s dive into Apple Pie Prep 101!

Image Source: ytimg.com
First things first, you’ll want to choose the right type of apple for your pie. While there are many varieties to choose from, some of the best options for baking include Granny Smith, Honeycrisp, and Braeburn apples. These apples hold their shape well when baked and provide the perfect balance of sweetness and tartness for your pie.
Next, it’s time to start chopping. Begin by washing and drying your apples thoroughly. You can peel your apples if you prefer, but leaving the skin on can add a nice texture and color to your pie. Using a sharp knife, carefully slice off the top and bottom of each apple to create a flat surface for stability.
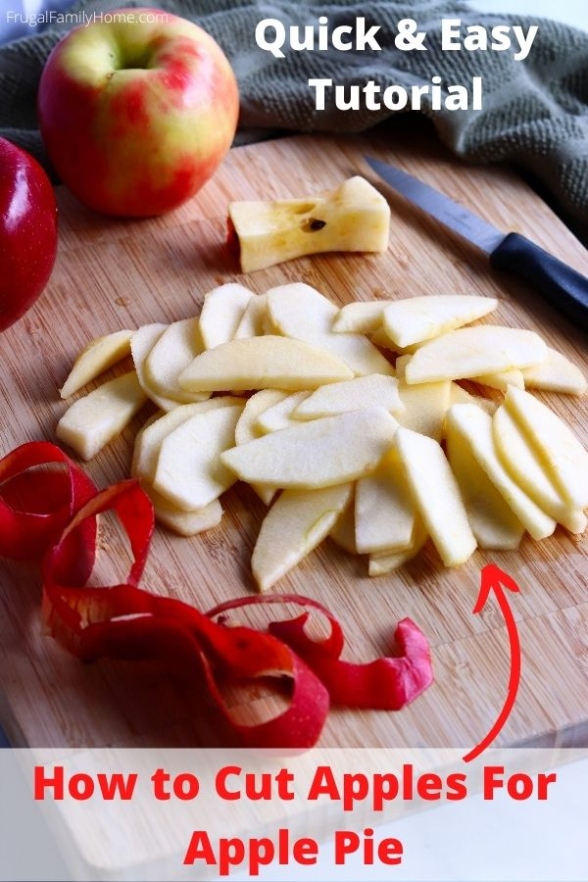
Image Source: frugalfamilyhome.com
Now, stand the apple upright on your cutting board and carefully slice down along the sides to remove the peel. Once your apple is peeled, cut it in half vertically and use a melon baller or paring knife to remove the core and seeds. You can also use an apple corer if you have one handy.
Once your apples are peeled and cored, it’s time to start slicing. The thickness of your slices can vary depending on your personal preference. Some people prefer thin slices for a softer filling, while others like thicker slices for a chunkier texture. Just be sure to keep your slices relatively uniform in size to ensure even baking.
If you prefer a more rustic look for your pie, you can also opt to dice your apples instead of slicing them. Simply cut your peeled and cored apples into small, bite-sized pieces for a chunkier filling. Diced apples can add a nice texture and flavor variation to your pie.
As you chop and slice your apples, be sure to keep them from browning by tossing them in a mixture of lemon juice and water. This will help preserve the color and freshness of your apples until they are ready to be baked.
Once your apples are prepped and ready to go, you can start layering them into your pie crust. Be sure to pack the apples tightly together to avoid gaps and ensure a full pie filling. You can also sprinkle a mixture of sugar, cinnamon, and flour over the apples for added flavor and thickness.
With your apples chopped, sliced, and ready for baking, you’re well on your way to creating the perfect apple pie. So, roll out your pie crust, fill it with your prepared apples, and get ready to enjoy a slice of apple pie perfection. Happy baking!
Master the Art of Slicing for Pie Perfection
Ah, the age-old question: how do you achieve that perfect slice of apple pie? It’s a dilemma that has plagued bakers for centuries, but fear not! With a few simple tips and tricks, you can master the art of slicing for pie perfection.
First things first: the type of apple you choose can make a big difference in the outcome of your pie. Some apples are better suited for baking than others, so be sure to choose a variety that holds its shape well and has a good balance of sweetness and tartness. Popular choices include Granny Smith, Honeycrisp, and Fuji apples.
Once you’ve selected your apples, it’s time to get chopping. The key to a perfect slice is uniformity – you want each piece to be the same size so that they cook evenly. Start by cutting your apple in half from top to bottom, then use a sharp knife to remove the core. From there, you can choose to peel the apple or leave the skin on for added texture and flavor.
When it comes to slicing your apples, there are a few different techniques you can try. One popular method is the classic crosswise slice, which produces round, uniform pieces that are perfect for layering in your pie. Another option is the julienne cut, which creates thin strips of apple that can add a unique twist to your pie filling.
If you’re looking to get fancy, you can also try your hand at the spiral cut. To achieve this technique, start by cutting your apple into quarters, then use a paring knife to carefully slice each quarter into thin, circular pieces. The end result is a visually stunning spiral of apple slices that will impress even the most discerning pie enthusiasts.
No matter which slicing technique you choose, be sure to pay attention to the thickness of your slices. Thin slices will cook faster and have a softer texture, while thicker slices will retain more of their shape and provide a satisfying bite. Experiment with different thicknesses to find the perfect balance for your pie.
Once you’ve mastered the art of slicing, it’s time to move on to the next step in the pie-making process. Whether you prefer a traditional lattice crust or a crumbly streusel topping, the key to a perfect apple pie lies in the details. Take your time to carefully arrange your apple slices in the pie crust, ensuring that each piece is evenly distributed for a beautiful presentation.
As your pie bakes in the oven, the aroma of cinnamon and sugar will fill your kitchen, creating a warm and inviting atmosphere that is sure to delight your senses. When the timer dings and you pull your pie out of the oven, don’t be afraid to admire your handiwork – after all, you’ve put in the time and effort to create a masterpiece.
So there you have it – with a little practice and a lot of love, you can master the art of slicing for pie perfection. Whether you’re baking for a special occasion or simply craving a sweet treat, a Homemade apple pie is sure to be a crowd-pleaser. So grab your apron and get slicing – your perfect pie awaits!
Slice, Dice, Repeat: Tips for the Perfect Pie
Ah, the sweet aroma of freshly baked apple pie wafting through the air is enough to make anyone’s mouth water. But before you can indulge in that delicious treat, you need to master the art of slicing and dicing apples for the perfect pie. Don’t worry, we’ve got you covered with some tips and tricks to ensure your apple pie turns out just right.
First things first, when it comes to slicing apples for pie, it’s important to choose the right kind of apple. While any apple can technically be used for pie, some varieties are better suited for baking than others. Granny Smith apples are a popular choice due to their tart flavor and ability to hold their shape during baking. Other good options include Honeycrisp, Jonagold, and Braeburn apples.
Once you’ve selected your apples, it’s time to start slicing. The key to a great apple pie is uniform slices, so try to cut your apples into evenly sized pieces. A mandoline slicer can be a handy tool for achieving consistent slices, but a sharp knife will do the trick as well. Just be sure to remove the core and seeds before slicing.
When it comes to dicing apples for pie, the size of the pieces can make a big difference in the final product. Larger chunks of apple will hold their shape better during baking, while smaller pieces will cook down into a softer filling. It’s all a matter of personal preference, so feel free to experiment to find the perfect texture for your pie.
To prevent your sliced or diced apples from browning while you prepare the rest of your pie, try tossing them in a mixture of lemon juice and water. The acid in the lemon juice will help slow down the oxidation process and keep your apples looking fresh and vibrant.
If you’re looking to add a little extra flavor to your apple pie, consider incorporating spices like cinnamon, nutmeg, and allspice into your filling. These warm, aromatic spices will complement the natural sweetness of the apples and take your pie to the next level.
When it comes to the crust of your apple pie, there are a few different options to consider. Traditionalists may opt for a classic flaky pie crust, while others might prefer a crumb topping or lattice crust. Whichever crust you choose, be sure to brush it with an egg wash before baking to achieve a golden, glossy finish.
Once your pie is assembled and ready to go in the oven, don’t forget to make a few slits in the top crust to allow steam to escape during baking. This will help prevent your pie from becoming soggy and ensure that the filling cooks evenly.
And finally, when your apple pie is golden brown and bubbling hot out of the oven, resist the urge to dig in right away. Letting your pie cool for at least a few minutes will allow the filling to set and make for easier slicing and serving.
With these tips and tricks in mind, you’ll be well on your way to creating the perfect apple pie. So go ahead, slice, dice, and repeat until you’ve mastered the art of apple pie perfection. Your taste buds will thank you!
From Core to Crust: Your Guide to Apple Pie Bliss
Ah, the classic apple pie – a beloved dessert that never fails to bring smiles to faces and warmth to hearts. And while the thought of biting into a perfectly baked slice of apple pie is enough to make anyone’s mouth water, the process of actually making one can be a bit daunting. But fear not, dear reader, for we are here to guide you through every step of the way, from core to crust, to ensure that your apple pie turns out just right.
First things first, let’s talk about the star of the show – the apples. Choosing the right apples for your pie is crucial to achieving that perfect balance of sweetness and tartness. Granny Smith apples are a popular choice for apple pies, as they hold their shape well when baked and provide a nice tangy contrast to the sweet filling. But feel free to experiment with different apple varieties to find the flavor profile that suits your taste buds best.
Once you’ve selected your apples, it’s time to tackle the daunting task of peeling and coring them. Some may find this step to be a bit tedious, but fear not – with the right tools and a little practice, you’ll be a pro in no time. Invest in a good quality apple corer and peeler to make the process quicker and easier. Simply place the apple on the corer, twist, and voila – you’ve got a perfectly cored and peeled apple ready to be sliced.
Now, onto the slicing. The thickness of your apple slices can make a big difference in the texture of your pie filling. Thin slices will cook faster and result in a softer filling, while thicker slices will hold their shape better and provide a bit of bite. Experiment with different slice thicknesses to find the perfect balance for your pie.
As you slice your apples, be sure to keep them uniform in size to ensure even cooking. Unevenly sliced apples can lead to some pieces being undercooked while others are mushy, which can throw off the texture of your pie filling. Take your time and pay attention to the size of your slices to achieve that picture-perfect pie.
Once your apples are sliced and ready to go, it’s time to prepare your pie crust. Whether you prefer to make your own crust from scratch or opt for a store-bought version, the key is to handle the dough gently to prevent it from becoming tough. Roll out your crust to the desired thickness and place it in your pie dish, ready to be filled with your delicious apple slices.
Now comes the fun part – assembling your apple pie. Start by layering your apple slices in the pie crust, making sure to pack them in tightly to avoid any gaps. Sprinkle a mixture of sugar, cinnamon, and a touch of flour over the apples to help thicken the filling and add a burst of flavor.
Once your pie is assembled, it’s time to add the top crust. Whether you opt for a traditional double-crust pie or a lattice design, be sure to seal the edges of the crust together to prevent any filling from leaking out during baking. A simple egg wash brushed over the crust will give your pie a beautiful golden finish once it’s baked to perfection.
Pop your pie into the oven and let the magic happen. The sweet aroma of cinnamon and apples will fill your kitchen as your pie bakes to a golden perfection. Keep an eye on the crust to ensure it doesn’t burn, and use a pie shield or foil to protect the edges if needed.
After what feels like an eternity of waiting, your apple pie is finally ready to be devoured. Let it cool slightly before slicing into it, allowing the filling to set and the flavors to meld together. Serve your pie with a scoop of vanilla ice cream or a dollop of whipped cream for the ultimate indulgence.
And there you have it – from core to crust, your guide to apple pie bliss. With a little practice and a whole lot of love, you’ll be baking up perfect apple pies that will have everyone coming back for seconds. So roll up your sleeves, grab some apples, and get ready to slice your way to apple pie perfection.
how to cut apples for apple pie


