
Let’s Get Baking: Pie Chart Edition!
Welcome to the wonderful world of pie charts! Just like baking a delicious pie, creating a pie chart in Word can be a fun and rewarding experience. Whether you’re a beginner or a seasoned pro, mastering the art of pie chart creation is a valuable skill that can be used in a variety of settings, from school projects to business presentations.
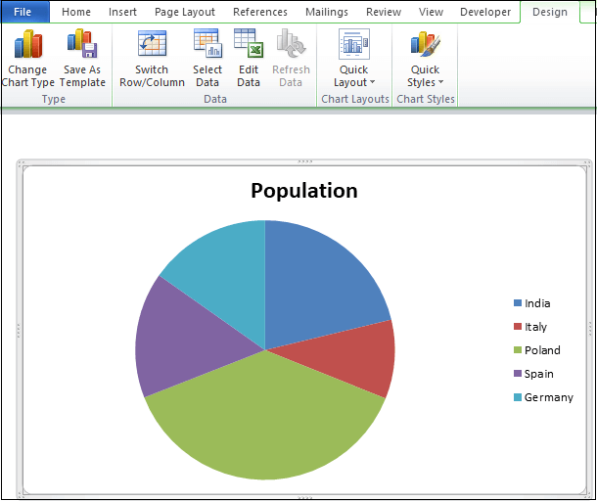
Image Source: javatpoint.com
So, let’s roll up our sleeves, preheat our creative ovens, and dive into the world of pie chart mastery!
The first step in creating a pie chart in Word is to gather your data. Just like choosing the perfect ingredients for a pie, you’ll want to carefully select the data that will best represent your information. Whether you’re working with sales figures, survey results, or any other type of data, make sure it’s organized and ready to go before you begin.
Next, open up Microsoft Word and select the Insert tab at the top of the screen. From there, click on the Chart option and choose Pie from the list of chart types. This will create a blank pie chart in your document, ready for you to customize with your data.
Now comes the fun part – filling in your pie chart with the data you’ve gathered! Simply click on the chart to select it, then go to the Chart Design tab at the top of the screen. From there, click on the Select Data button to input your data into the chart.
Once your data is entered, you can customize your pie chart to your heart’s content. Change the colors, add labels, adjust the size – the possibilities are endless! Just like adding the finishing touches to a pie, these customizations will make your pie chart stand out and look professional.
But wait, there’s more! In addition to customizing the appearance of your pie chart, you can also add a title and labels to make it even more informative. Simply click on the chart to select it, then go to the Chart Elements button and choose which elements you want to include. Adding a title and labels will help your audience understand the data you’re presenting and make your pie chart even more visually appealing.
And there you have it – a beautifully crafted pie chart, ready to be shared with the world! Just like baking a pie, creating a pie chart in Word takes time, patience, and a dash of creativity. But with a little practice and the right tools, you’ll be well on your way to mastering the art of pie chart creation.
So, the next time you need to visually represent data in Word, don’t be afraid to roll up your sleeves and get baking – pie chart edition! With a little bit of wizardry and a whole lot of creativity, you’ll be creating stunning pie charts that will impress your audience and make your data shine.
A Slice of Pie Chart Mastery
Welcome to the wonderful world of pie charts! If you’re looking to add a touch of visual appeal to your documents or presentations, mastering the art of creating a pie chart in Word is a skill worth acquiring. Pie charts are not only visually appealing but also a great way to present data in a clear and concise manner.
To begin your journey towards pie chart mastery, you first need to open Microsoft Word and navigate to the Insert tab. From there, click on the Chart option and select the Pie Chart category. You will be presented with various types of pie charts to choose from, such as 2D or 3D pie charts, doughnut charts, and exploded pie charts. Select the type that best suits your data and click OK.
Once you have selected your desired pie chart type, a blank chart will appear on your Word document. This is where the fun begins! You can now input your data into the chart by clicking on the Excel spreadsheet that pops up. Enter your data into the cells provided, making sure to include labels for each data point.
Now that you have inputted your data, it’s time to customize your pie chart to make it visually appealing and easy to understand. You can do this by clicking on the Chart Elements button that appears when you click on your chart. From here, you can add or remove elements such as data labels, a legend, or a title to make your chart more informative.
In addition to customizing the elements of your pie chart, you can also change the colors and styles of the chart to make it more visually appealing. Simply click on the Chart Styles button to explore different color schemes and designs for your chart. You can also change the font size and style of the chart labels to make them more readable.
Once you are satisfied with the appearance of your pie chart, it’s time to finalize and insert it into your Word document. Simply click on the Insert button, and your pie chart will be added to your document. You can then resize and move the chart to wherever you like on the page to make it fit seamlessly with your content.
Congratulations! You have now mastered the art of creating a pie chart in Word. With your newfound skills, you can create visually stunning charts to present your data in a clear and concise manner. Whether you’re working on a school project, a business presentation, or simply want to add some flair to your documents, pie charts are a versatile and effective tool for visualizing data.
So why wait? Start creating your own pie charts today and impress your audience with your newfound mastery of this visual art form. Happy charting!
Word Wizardry: Pie Chart Creation
Are you ready to delve into the magical world of pie charts in Microsoft Word? If so, then you’ve come to the right place! In this article, we will explore the art of creating visually appealing and informative pie charts using the powerful tools available in Word.
Pie charts are an excellent way to represent data in a visually engaging format. They allow you to quickly and easily convey complex information in a simple and easy-to-understand manner. With the right tools and knowledge, you can create stunning pie charts that will impress your colleagues and clients.
So, let’s get started with our step-by-step guide to mastering the art of creating a pie chart in Word.
Step 1: Open Microsoft Word and create a new document.
The first step in creating a pie chart in Word is to open a new document. Once you have your document open, you can begin the process of adding your data to create your chart.
Step 2: Enter your data into a table.
To create a pie chart, you will need to input your data into a table format. This will allow Word to easily convert your data into a visual representation. You can create a table by going to the Insert tab in Word and selecting Table. From there, you can choose the number of rows and columns you need for your data.
Step 3: Select your data and insert a pie chart.
Once you have entered your data into a table, you can select the data that you want to represent in your pie chart. To do this, simply click and drag your mouse over the cells containing your data. Once you have selected your data, go to the Insert tab in Word and select Pie Chart from the charts section.
Step 4: Customize your pie chart.
After inserting your pie chart into your document, you can customize it to fit your needs. You can change the colors, labels, and styles of your chart by right-clicking on different elements of the chart and selecting the options that you prefer. This will allow you to create a pie chart that is not only informative but also visually appealing.
Step 5: Add a title and labels to your pie chart.
To make your pie chart even more informative, you can add a title and labels to help your audience understand the data you are presenting. You can add a title by clicking on the chart and typing in the title you want to use. You can also add labels to your chart by right-clicking on the chart and selecting the Add Data Labels option.
Step 6: Save and share your pie chart.
Once you have customized your pie chart to your liking, you can save your document and share your chart with others. You can save your document by going to the File tab in Word and selecting Save As. From there, you can choose where you want to save your document and what format you want to save it in.
And there you have it! With these simple steps, you can create a beautiful and informative pie chart in Microsoft Word. So, next time you need to present data in a clear and engaging way, don’t forget to use the Word wizardry of pie chart creation to impress your audience.
Step-by-Step Guide to Pie Chart Perfection
Are you ready to take your pie chart creation skills to the next level? Look no further, because we have got you covered with a step-by-step guide to achieving pie chart perfection in Word!
Step 1: Open Microsoft Word
The first step in creating a pie chart in Word is to open the program on your computer. Once Word is up and running, you’re ready to dive into the world of data visualization.
Step 2: Input Your Data
Next, input the data that you want to represent in your pie chart. This could be anything from sales figures to survey results. Make sure to organize your data in a clear and concise manner to ensure accuracy in your chart.
Step 3: Select Your Data
Highlight the data that you want to include in your pie chart. This will typically involve selecting a range of cells in an Excel spreadsheet or table in Word. Once you have selected your data, you’re ready to move on to the next step.
Step 4: Insert a Pie Chart
With your data selected, navigate to the Insert tab in Word and click on the Pie Chart option. This will bring up a variety of pie chart options for you to choose from. Select the style that best suits your data and click OK to insert the chart into your document.
Step 5: Customize Your Chart
Once your pie chart is inserted, it’s time to customize it to fit your needs. You can change the colors, labels, and other elements of the chart by clicking on different parts of the chart and using the formatting options in Word. Experiment with different styles until you achieve the perfect look for your data.
Step 6: Add a Title
To make your pie chart more informative, consider adding a title. Click on the chart to select it, then navigate to the Chart Tools tab and click on Chart Title. Enter a descriptive title for your chart that clearly conveys the information it represents.
Step 7: Fine-Tune Your Chart
Don’t be afraid to make adjustments to your chart as needed. You can resize the chart, change the layout, and tweak the colors until you are satisfied with the final product. Remember, the goal is to create a visually appealing and easy-to-understand representation of your data.
Step 8: Save and Share Your Chart
Once you are happy with your pie chart, it’s time to save your document. Click on the File tab in Word, select Save As, and choose a location on your computer to save the file. You can then share your pie chart with others by printing it out, sending it via email, or embedding it in a presentation.
Congratulations! You have successfully mastered the art of creating a pie chart in Word. With these step-by-step instructions, you can confidently tackle any data visualization project and impress your colleagues with your chart-making skills. So go ahead, unleash your creativity, and start creating beautiful pie charts today!
how to do a pie chart on word


