
Let’s Get Baking: Draw Your Dream Pumpkin Pie!
Are you ready to embark on a deliciously creative journey? Today, we are going to explore the art of drawing a mouthwatering pumpkin pie. Get your pencils sharpened and your imagination ready as we delve into the step-by-step guide to mastering the art of creating a visually appealing pumpkin pie masterpiece.
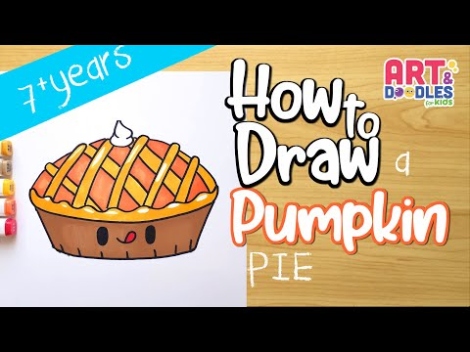
Image Source: ytimg.com
First things first, gather all your artistic tools. You will need a sketchpad, pencils of various shades, an eraser, and a sharpener. Make sure you have a clear workspace where you can let your creativity flow freely. Now, let’s dive into the exciting world of drawing a scrumptious pumpkin pie.
Start by sketching the outline of your pumpkin pie. Begin with a large circle to represent the shape of the pie. Add a smaller circle inside the larger one to create the crust of the pie. Make sure to leave enough space for the filling in the center. Don’t worry about perfection at this stage, as we will refine the details later on.
Next, focus on adding detail to the crust of the pie. Draw small lines along the edge of the smaller circle to create a flaky texture. You can also add crisscross patterns or swirls to make the crust look more realistic. Take your time with this step, as the crust is an essential part of any pumpkin pie drawing.
Now, it’s time to move on to the filling. Draw another circle within the crust to represent the pumpkin filling. Add curved lines to mimic the texture of the pumpkin pie filling. Don’t forget to add a sprinkle of cinnamon on top for that extra touch of flavor. Remember, the filling is what makes a pumpkin pie truly irresistible, so take your time to get it just right.
Once you are satisfied with the base of your pumpkin pie, it’s time to add the finishing touches. Whip up some whipped cream by drawing fluffy clouds on top of the pie. You can also sprinkle some cinnamon or nutmeg for added flavor. Get creative with your toppings, as this is where you can really make your pumpkin pie stand out.
As you put the final touches on your pumpkin pie drawing, take a step back and admire your work. You have successfully captured the essence of a delicious pumpkin pie on paper. Your attention to detail and creativity have brought this dessert to life in a beautiful and enticing way.
Drawing a pumpkin pie is not just about putting pencil to paper; it’s about capturing the essence of this beloved dessert and bringing it to life through your art. By following this step-by-step guide, you have mastered the art of drawing a delicious pumpkin pie. Now, it’s time to share your masterpiece with the world and inspire others to create their own delectable pumpkin pie drawings. Happy baking!
Starting with the Crust: A Flaky Foundation
Welcome to the second step in our step-by-step guide to mastering the art of drawing a delicious pumpkin pie! In this section, we will focus on creating the perfect flaky pie crust for your masterpiece. The crust is not only the foundation of your pie but also adds a delicious crunch that complements the creamy pumpkin filling. So, let’s roll up our sleeves and get started!
To begin, you’ll need a few essential tools and ingredients. Make sure you have a rolling pin, a pastry cutter, flour, butter, salt, sugar, and ice water on hand. These ingredients will help you create a flaky and buttery crust that will elevate your pumpkin pie to the next level.
Start by mixing the flour, salt, and sugar in a large mixing bowl. Cut the cold butter into small cubes and add it to the dry ingredients. Using a pastry cutter or your fingers, work the butter into the flour mixture until it resembles coarse crumbs. This step is crucial as it helps create those flaky layers that we all love in a good pie crust.
Next, slowly drizzle in the ice water, a little at a time, and mix the dough until it comes together. Be careful not to overwork the dough, as this can result in a tough crust. Once the dough forms a cohesive ball, wrap it in plastic wrap and refrigerate it for at least 30 minutes. Chilling the dough allows the gluten to relax and prevents shrinkage during baking.
After the dough has chilled, it’s time to roll it out. Lightly flour your work surface and rolling pin to prevent sticking. Roll the dough into a circle, about 1/8 inch thick, making sure to rotate it frequently to ensure an even thickness. Carefully transfer the dough to your pie dish, gently pressing it into the corners and trimming any excess overhang.
Now comes the fun part – crimping the edges! Use your fingers or a fork to create a decorative border around the edge of the pie. This not only adds a decorative touch but also helps seal in the filling. You can also use a pastry cutter or cookie cutters to create intricate designs on the crust for a more visually appealing pie.
Before baking, don’t forget to blind bake the crust. This involves lining the crust with parchment paper and filling it with pie weights or dried beans to prevent it from puffing up during baking. Preheat your oven to the specified temperature and bake the crust until it’s lightly golden brown. This step ensures that your crust is fully cooked and maintains its flaky texture.
Once your crust is baked and cooled, it’s ready to be filled with the delicious pumpkin filling we’ll be making in the next step. The flaky, buttery crust will provide the perfect contrast to the creamy pumpkin filling, creating a harmonious balance of flavors and textures in every bite.
With the crust complete, you’re one step closer to creating a mouthwatering pumpkin pie that will impress all your friends and family. So, take your time to perfect the flakiness of the crust and enjoy the process of creating a Homemade dessert that is as beautiful as it is delicious. Stay tuned for the next step in our guide, where we’ll delve into the art of crafting the perfect pumpkin filling for your pie.
Filling in the Flavor: Pumpkin Perfection
When it comes to creating a delicious pumpkin pie, the filling is the star of the show. Rich, creamy, and bursting with autumn flavors, the pumpkin filling is what makes this dessert a true classic. In this step-by-step guide, we will show you how to master the art of creating the perfect pumpkin filling for your pie.
To begin, you will need to gather your ingredients. You will need canned pumpkin puree, sweetened condensed milk, eggs, brown sugar, cinnamon, nutmeg, ginger, cloves, and salt. These ingredients come together to create a smooth and flavorful filling that will have your taste buds singing.
Start by preheating your oven to 425°F. While the oven is heating up, mix together the canned pumpkin puree, sweetened condensed milk, and eggs in a large bowl. Whisk until the mixture is smooth and well combined. Next, add in the brown sugar, cinnamon, nutmeg, ginger, cloves, and salt. These spices are what give the pumpkin filling its warm and cozy flavor.
Once all of the ingredients are mixed together, pour the filling into your prepared pie crust. Use a spatula to smooth out the top of the filling, making sure it is evenly distributed. Place the pie in the preheated oven and bake for 15 minutes.
After 15 minutes, reduce the oven temperature to 350°F and continue baking for another 35-40 minutes, or until the filling is set. You can test the doneness of the pie by inserting a knife into the center – if it comes out clean, the pie is ready.
As the pie bakes, your kitchen will be filled with the warm and inviting scent of pumpkin and spices. It’s the perfect aroma for a cozy fall day, and it will have your mouth watering in anticipation of that first delicious bite.
Once the pie is done baking, remove it from the oven and let it cool completely before serving. Some people prefer to serve their pumpkin pie warm, while others enjoy it chilled – it’s all a matter of personal preference.
Before serving, you can add some finishing touches to your pumpkin pie. A dollop of whipped cream on top is a classic choice, adding a light and airy contrast to the rich pumpkin filling. You can also sprinkle some cinnamon on top for an extra burst of flavor and a touch of visual appeal.
And there you have it – a delicious pumpkin pie, filled to perfection with creamy, spiced pumpkin filling. This dessert is sure to be a hit at any fall gathering, and mastering the art of creating the perfect pumpkin filling is the key to a truly delicious pie. So grab your apron, preheat your oven, and get ready to wow your friends and family with a Homemade pumpkin pie that is sure to impress.
Finishing Touches: Whipped Cream and Cinnamon Sprinkles
As you put the final touches on your delicious pumpkin pie drawing, don’t forget the whipped cream and cinnamon sprinkles! These two elements are essential for adding a touch of sweetness and flair to your masterpiece.
To start, imagine a large dollop of fluffy whipped cream sitting atop your pumpkin pie. Use quick, light strokes to create the texture of the whipped cream, making it look light and airy. You can use a white colored pencil or marker to fill in the whipped cream, leaving some white space to give it a realistic appearance.
Next, sprinkle some cinnamon over the whipped cream to add a pop of color and flavor. Use a light brown colored pencil or marker to gently sprinkle the cinnamon on top of the whipped cream. You can also add some extra detail by lightly shading around the edges of the whipped cream to give it a three-dimensional look.
To make your whipped cream and cinnamon sprinkles really stand out, consider adding a shadow underneath them. This will give the illusion that they are sitting on top of the pumpkin pie and not just floating in space. Use a darker shade of brown to create a subtle shadow underneath the whipped cream and cinnamon sprinkles, blending it outwards to create a soft, realistic effect.
Don’t be afraid to play around with different techniques and styles when adding the whipped cream and cinnamon sprinkles. You can create a more abstract look by using bold lines and shapes, or opt for a more realistic approach by adding intricate details and shading.
Remember, the key to drawing delicious whipped cream and cinnamon sprinkles is to have fun and let your creativity shine. Experiment with different textures, colors, and styles until you find the perfect combination that brings your pumpkin pie drawing to life.
So, as you put the finishing touches on your pumpkin pie masterpiece, don’t forget to add a generous helping of whipped cream and a sprinkle of cinnamon to make it truly irresistible. Your drawing will look good enough to eat, and you’ll have mastered the art of creating a delicious pumpkin pie that is sure to impress.
how to draw pumpkin pie


