
Indulge in Apple Pie Anytime!
There’s nothing quite like the smell of a freshly baked apple pie wafting through the kitchen. The warm spices, the tender apples, the flaky crust – it’s a treat that never fails to bring comfort and joy. But what if you could enjoy that same delicious pie anytime you want, without having to go through the hassle of making it from scratch every time? That’s where freezing your apple pie comes in.
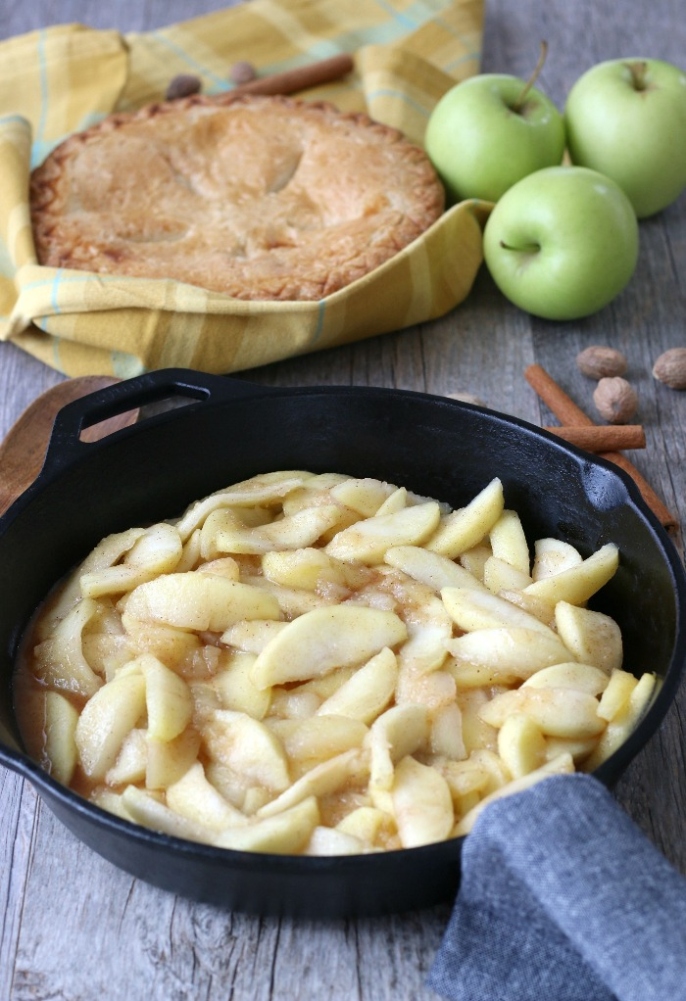
Image Source: thefoodieaffair.com
By learning how to properly freeze an apple pie, you can have a delectable dessert ready to go whenever the craving strikes. Whether you’re a busy parent looking for a quick and easy treat for the kids, a hostess preparing for a last-minute gathering, or just someone who loves apple pie but doesn’t always have the time to make it, freezing your apple pie is a game-changer.
When you freeze an apple pie, you’re not just preserving a dessert – you’re preserving a moment. The memories of enjoying a slice of warm apple pie with a scoop of vanilla ice cream on a crisp fall evening can be revisited anytime you want, simply by pulling a frozen pie out of the freezer.
But freezing an apple pie is not as simple as tossing it in the freezer and calling it a day. To ensure that your pie remains as delicious and fresh-tasting as the day you made it, there are a few key tips and tricks to keep in mind.
First and foremost, it’s important to let your apple pie cool completely before attempting to freeze it. This allows the pie to set properly and prevents any excess moisture from forming, which can lead to sogginess once the pie is thawed.
Once your pie has cooled, wrap it tightly in a layer of plastic wrap, followed by a layer of aluminum foil. This double-layered protection helps to seal in the flavors and prevent any freezer burn from occurring. Be sure to label your pie with the date it was made, so you can keep track of how long it has been in the freezer.
When it comes time to thaw your apple pie, there are a few options depending on how quickly you want to enjoy it. For a faster thaw, you can place the wrapped pie in the refrigerator overnight. If you’re short on time, you can also let the pie sit at room temperature for a few hours until it is thawed completely.
Once your pie is thawed, simply reheat it in the oven at a low temperature until it is warmed through. This ensures that the crust stays flaky and crisp, while the filling remains gooey and delicious.
By learning how to freeze an apple pie, you can indulge in this classic treat anytime you want, without the hassle of making it from scratch. So go ahead, whip up a delicious pie, freeze it for later enjoyment, and savor the flavors of fall whenever the mood strikes.
Freeze Your Way to Sweet Bliss
Are you a fan of apple pie but find yourself too busy to make one from scratch every time you have a craving? Well, fear not! With a little bit of preparation and know-how, you can whip up a delicious treat and learn how to freeze an apple pie for later enjoyment.
Freezing apple pie is a great way to have a tasty dessert on hand whenever the mood strikes. Whether you’re hosting a last-minute dinner party, craving a sweet treat on a busy weeknight, or simply want to have a Homemade dessert ready to go at a moment’s notice, freezing an apple pie is the perfect solution.
To get started, you’ll need to make your apple pie as you normally would. Whether you have a favorite Recipes-ideas/’>Recipe that’s been passed down through generations or you’re trying a new one for the first time, the key is to bake the pie as if you were going to serve it immediately. Once your pie is baked to perfection, allow it to cool completely before attempting to freeze it.
When it comes to freezing apple pie, there are a few different methods you can use. One popular option is to freeze the pie before baking it. This method involves assembling the pie as you normally would but instead of popping it in the oven, you place it in the freezer to set. Once the pie is frozen solid, you can wrap it in plastic wrap and aluminum foil to protect it from freezer burn. When you’re ready to bake the pie, simply unwrap it and pop it in the oven – no thawing necessary!
Another option is to freeze the pie after it has been baked. This method is great for those who prefer the convenience of having a ready-to-eat dessert on hand. Simply allow the pie to cool completely after baking, then wrap it in plastic wrap and aluminum foil before placing it in the freezer. When you’re ready to enjoy your apple pie, you can either thaw it in the refrigerator overnight or bake it straight from the freezer for a slightly longer cooking time.
No matter which method you choose, the key to successfully freezing an apple pie is proper packaging. Make sure to wrap the pie tightly to prevent any air from getting in and causing freezer burn. You’ll also want to label the package with the date it was made so you can keep track of how long it has been in the freezer.
When it comes time to enjoy your frozen apple pie, there are a few different ways you can go about it. If you froze the pie before baking it, you can simply bake it straight from the freezer according to your recipe’s instructions. If you froze the pie after baking it, you can either thaw it in the refrigerator overnight or bake it straight from the freezer with a slightly longer cooking time.
No matter which method you choose, you’re sure to be delighted by the delicious flavors of fall that come through in every bite. So why not whip up a delicious treat today and learn how to freeze an apple pie for later enjoyment? You’ll thank yourself later when you have a tasty dessert ready to go at a moment’s notice!
Tips for Preserving Homemade Pies
Are you a pie aficionado who loves to whip up delicious treats to enjoy later on? If so, you’ll be delighted to learn about the art of preserving Homemade pies. One of the most beloved desserts you can make is a classic apple pie, and knowing how to freeze it for later enjoyment can come in handy when you’re craving a sweet treat but don’t have the time to bake from scratch.
Preserving homemade pies is a great way to ensure that you always have a delectable dessert on hand whenever the craving strikes. By following a few simple tips and tricks, you can freeze your pies in a way that maintains their flavor and texture so that they taste just as delicious as the day you made them.
When it comes to freezing homemade pies, there are a few key things to keep in mind. First, it’s important to let your pie cool completely before attempting to freeze it. This will prevent condensation from forming inside the container and causing the crust to become soggy. Once your pie has cooled, you can wrap it tightly in plastic wrap or aluminum foil to protect it from freezer burn.
Another important tip for preserving homemade pies is to choose the right container for freezing. Opt for a sturdy, airtight container that will protect your pie from freezer burn and keep it fresh for longer. You can also use a freezer-safe pie plate or dish if you prefer to freeze your pie in the same container you baked it in.
Before freezing your pie, it’s a good idea to label it with the date so that you can keep track of how long it has been in the freezer. Most homemade pies will last for up to three months in the freezer, but it’s always best to consume them sooner rather than later for the best taste and texture.
When you’re ready to enjoy your frozen pie, simply remove it from the freezer and let it thaw in the refrigerator overnight. Once it has thawed completely, you can reheat it in the oven at a low temperature to restore its crispy crust and gooey filling.
Preserving homemade pies is a great way to save time and effort in the kitchen while still enjoying a delicious dessert whenever you please. Whether you’re a seasoned baker or just starting out, knowing how to freeze your pies for later enjoyment is a valuable skill that will come in handy time and time again.
So why not whip up a delicious apple pie today and freeze it for later enjoyment? With these handy tips for preserving homemade pies, you’ll always have a sweet treat on hand whenever the craving strikes. Go ahead, savor the flavors of fall later on with a perfectly preserved homemade pie!
body {
font-family: Arial, sans-serif;
line-height: 1.6;
margin: 40px;
}
h1 {
text-align: center;
}
h2 {
color: #FF5733;
}
p {
text-align: justify;
}
Whip up a delicious treat: Learn how to freeze an apple pie for later enjoyment
Savor the Flavors of Fall Later on
There’s something truly magical about the flavors of fall – crisp apples, warm spices, and buttery pastry all come together to create the perfect autumn treat. And what better way to savor those flavors than with a delicious apple pie? But what if you don’t have time to bake a fresh pie every time a craving strikes? That’s where the beauty of freezing comes in! By learning how to properly freeze an apple pie, you can enjoy the taste of fall anytime you want.
Freezing an apple pie is a simple and convenient way to have a Homemade dessert on hand whenever you need it. Whether you want to save time during a busy week or just have a sweet treat ready to go for unexpected guests, having a frozen pie in your freezer is a game-changer.
So, how exactly do you go about freezing an apple pie? The key is to follow a few simple steps to ensure that your pie freezes well and maintains its delicious flavor and texture. Here are some tips to help you savor the flavors of fall later on:
1. Prepare Your Pie: Start by baking your apple pie according to your favorite Recipes-ideas/’>Recipe. Let the pie cool completely before attempting to freeze it. This will help prevent ice crystals from forming on the surface of the pie.
2. Wrap it Up: Once your pie has cooled, wrap it tightly in several layers of plastic wrap. This will help protect the pie from freezer burn and keep it fresh for longer. You can also place the wrapped pie in a resealable freezer bag for extra protection.
3. Label and Date: Before placing your pie in the freezer, be sure to label it with the date it was made. This will help you keep track of how long the pie has been frozen and ensure that you use it before it loses its quality.
4. Freeze Properly: Lay your wrapped and labeled pie flat in the freezer to freeze it. Once the pie is frozen solid, you can store it upright to save space. Freezing the pie flat initially will help it maintain its shape and prevent any toppings or Decorations from getting smushed.
5. Thaw and Bake: When you’re ready to enjoy your apple pie, simply remove it from the freezer and let it thaw in the refrigerator overnight. Once thawed, you can bake the pie in a preheated oven to warm it up and crisp up the crust. Your home will be filled with the delightful aroma of freshly baked pie in no time!
By following these simple steps, you can have the joy of a freshly baked apple pie anytime you want, without all the hassle of baking from scratch. So go ahead, whip up a delicious treat and learn how to freeze an apple pie for later enjoyment. Your taste buds will thank you!
how to freeze an apple pie


